7 Ways to Turn Photos Into Wall Art

This article has been written by

Turn photos into beautiful wall art by choosing high-resolution images, matching print sizes to your space, and selecting a finish that suits your style. Start with one favorite photograph or a small collection, then use professional printing and thoughtful framing to create a polished display that feels personal and lasts.

Photorealistic framed landscape photograph above a minimalist living room console

Why turn photos into wall art?

A favorite photograph can do more than live on your phone or computer. Printed wall art adds color, personality, and memories to a room. It can also transform meaningful moments—such as a wedding, family trip, landscape, or candid portrait—into something you enjoy every day.

Printed photos make especially thoughtful gifts for:

  • New homeowners
  • Parents and grandparents
  • Couples celebrating an anniversary
  • Friends who love travel or nature
  • Anyone decorating a new office or room

Before ordering, consider where the artwork will go, how much wall space you have, and whether you want one statement piece or a coordinated collection. Our Prints & Gifts options can help you move from a digital file to a finished keepsake.

Which photos work best for wall art?

The best images for wall art are sharp, well-composed, and meaningful to you. A technically imperfect photograph can still look wonderful if the moment matters, but image quality becomes more important as print size increases.

Look for photos with:

  • Good lighting and clear detail
  • A strong subject or simple composition
  • Colors that complement the room
  • Enough space around the subject for cropping
  • A resolution suitable for the final print size

Portraits, favorite places, pets, architecture, flowers, and black-and-white street scenes can all work beautifully. You do not need professional photography equipment. A carefully chosen phone photo may produce excellent results when viewed at a normal distance.

Check the crop before printing. A wide image may need to be trimmed for a square frame, while a vertical portrait may suit a narrow wall. If an image is too small for your intended size, choose a smaller print rather than stretching it until details look soft.

How do you choose the right print size?

Choose a print size based on the wall, viewing distance, and role the image will play in the room. Large walls usually need a larger print or a group of coordinated pieces; small spaces often look better with one modest print or a vertical arrangement.

Use these starting points:

  • Small prints: Ideal for shelves, bedside tables, desks, and compact gallery walls.
  • Medium prints: A versatile choice for hallways, bedrooms, and above smaller furniture.
  • Large prints: Best for making one photograph the focal point above a sofa, bed, or console.
  • Multiple prints: Useful when you want to tell a story or combine several related images.

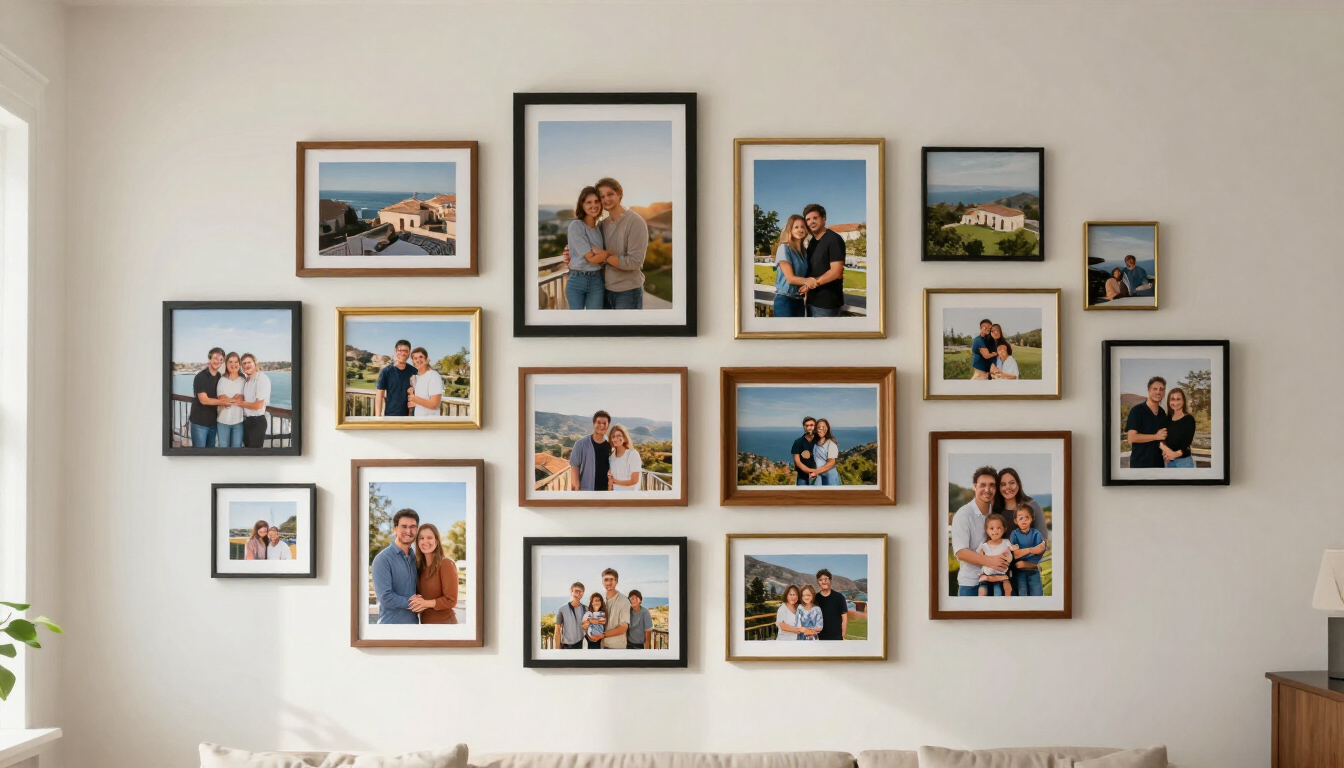
For a gallery wall, keep one element consistent. You might use the same frame color, print finish, border style, or subject theme. Consistency makes different images feel intentional rather than cluttered.

A helpful rule is to keep artwork approximately two-thirds the width of the furniture beneath it. Leave enough breathing room around each frame, and lay the arrangement on the floor before putting nails in the wall.

Which photo finish should you choose?

The right finish depends on lighting, style, and how often the artwork will be handled. Each option creates a different visual effect.

  • Matte: Soft, elegant, and less reflective. It works well in bright rooms and for black-and-white photography.
  • Glossy: Produces vivid color and strong contrast. It can make landscapes and colorful travel photos stand out.
  • Lustre or satin: Offers balanced color with less glare than glossy paper. It is a flexible choice for most rooms.
  • Canvas: Adds texture and a gallery-inspired appearance, especially for landscapes and portraits.
  • Mounted prints: Provide a clean, modern look and may be ready to display with minimal framing.

If the artwork will hang opposite a window or bright lamp, avoid highly reflective surfaces. If you want rich color and maximum detail, a professional print is usually more satisfying than a standard home printer.

Photorealistic close-up of hands selecting matte, glossy, and canvas photo print samples on a design table

How should you frame and display photo prints?

Framing protects your print and helps it work with the rest of your decor. Choose a frame that supports the image without competing with it.

Consider these combinations:

  • Natural wood for outdoor, family, and travel photographs
  • Black or white frames for modern interiors
  • Metallic frames for formal rooms or high-contrast images
  • A wide mat for portraits and traditional displays
  • Minimal edge-to-edge mounting for contemporary spaces

Use UV-protective glazing when possible, particularly for artwork placed in direct sunlight. Keep prints away from damp areas, heat sources, and locations where condensation may build up. These simple precautions help preserve color and paper quality.

For a gallery wall, mix landscape and portrait orientations carefully. Start with the largest image, then build outward with smaller pieces. Leave consistent gaps between frames, and use paper templates to test the layout before hanging it.

Seven creative wall art ideas

1. Create a single statement print

Choose one image with strong emotion, color, or composition. Enlarge it, give it room to breathe, and place it where it can become the visual anchor of the room.

2. Build a travel story

Select three to five photographs from one trip. Combine a landmark, a detail, a landscape, and an everyday moment for a display that feels like a visual narrative.

3. Make a family timeline

Arrange portraits from different years or generations. Matching frames can unify photographs with different lighting and backgrounds.

4. Design a tonal collection

Choose images that share a color family, such as warm neutrals, ocean blues, or muted greens. This is an easy way to create a calm, coordinated wall.

5. Turn a pet photo into a focal point

A close crop, expressive pose, or black-and-white treatment can give a beloved pet portrait a polished, gallery-style feel.

6. Use a seasonal rotation

Print a small set of photographs and change them throughout the year. Display spring flowers, summer travel, autumn scenes, or winter memories as the seasons change.

7. Combine prints with personal objects

Pair photographs with a small mirror, shelf, plant, or meaningful object. Keep the arrangement balanced so the wall feels collected rather than crowded.

How can you prepare photos before ordering?

A few minutes of preparation can improve the final result. First, save the original file rather than a compressed version downloaded from a social platform. Then review brightness, color, and orientation on a reliable screen.

Before checkout:

  1. Remove accidental duplicates and choose the strongest image.
  2. Check the crop at the intended aspect ratio.
  3. Confirm that faces, horizons, and important details are not too close to the edge.
  4. Compare the file dimensions with the desired print size.
  5. Order a smaller test print if you are uncertain about color or sharpness.

If your only copy is an old print, damaged photograph, or low-quality scan, Photo Restoration may help prepare it for display. For albums, negatives, or older physical images, Photo Scanning can create a better digital starting point.

A simple plan for beautiful photo wall art

Turning photos into wall art is easiest when you make decisions in order: choose the image, check its quality, select the size, pick a finish, and plan the display. Use matte or lustre for low-glare versatility, glossy for vivid color, and canvas for texture. Keep your arrangement consistent with the room and protect finished prints from sunlight and moisture. Next, review your favorite images, measure the wall, and explore the Printing Catalog to compare suitable print options. A thoughtful photograph, printed well and displayed intentionally, can become meaningful decor for years.

Camera services at Cardinal Camera, including repairs, film, and photo printing
November 4, 2026
Explore Cardinal Camera's camera services, from repairs and film development to photo scanning, restoration, rentals, passport photos, and video transfers.
Camera gear selection with camera, lens, and accessories
November 4, 2026
Learn how to choose camera gear with practical advice from Cardinal Camera experts. Compare cameras, lenses, accessories, and rentals for your photography goals.
Landscape photography tips for better mountain photos
November 4, 2026
Use these practical landscape photography tips to improve composition, light, camera settings, focus, and field workflow for sharper, more compelling photos.
Show More
Camera services at Cardinal Camera, including repairs, film, and photo printing
November 4, 2026
Explore Cardinal Camera's camera services, from repairs and film development to photo scanning, restoration, rentals, passport photos, and video transfers.
Camera gear selection with camera, lens, and accessories
November 4, 2026
Learn how to choose camera gear with practical advice from Cardinal Camera experts. Compare cameras, lenses, accessories, and rentals for your photography goals.
Landscape photography tips for better mountain photos
November 4, 2026
Use these practical landscape photography tips to improve composition, light, camera settings, focus, and field workflow for sharper, more compelling photos.
Show More

Share this article